DIY Shaker Cabinet Door Tutorial – Step-By-Step Guide
Are you ready to transform your kitchen with a fresh, modern look? Why not try your hand at creating your own DIY shaker cabinet door? Not only will you save money compared to purchasing pre-made custom doors, but you’ll also have the satisfaction of knowing you crafted them yourself! In this blog post, we will guide you through the entire process. A process that includes: understanding the DIY shaker cabinet door design to selecting the right materials, measuring, cutting, assembling, and finishing your beautiful new cabinet doors. Let’s dive in and start this exciting DIY journey together!
Short Summary
- Understand and choose the right wood for your shaker cabinet doors
- Measure with precision to get perfect fitting doors
- Excitingly build, paint/stain, install hardware & hinges on DIY Shaker Cabinet Doors!
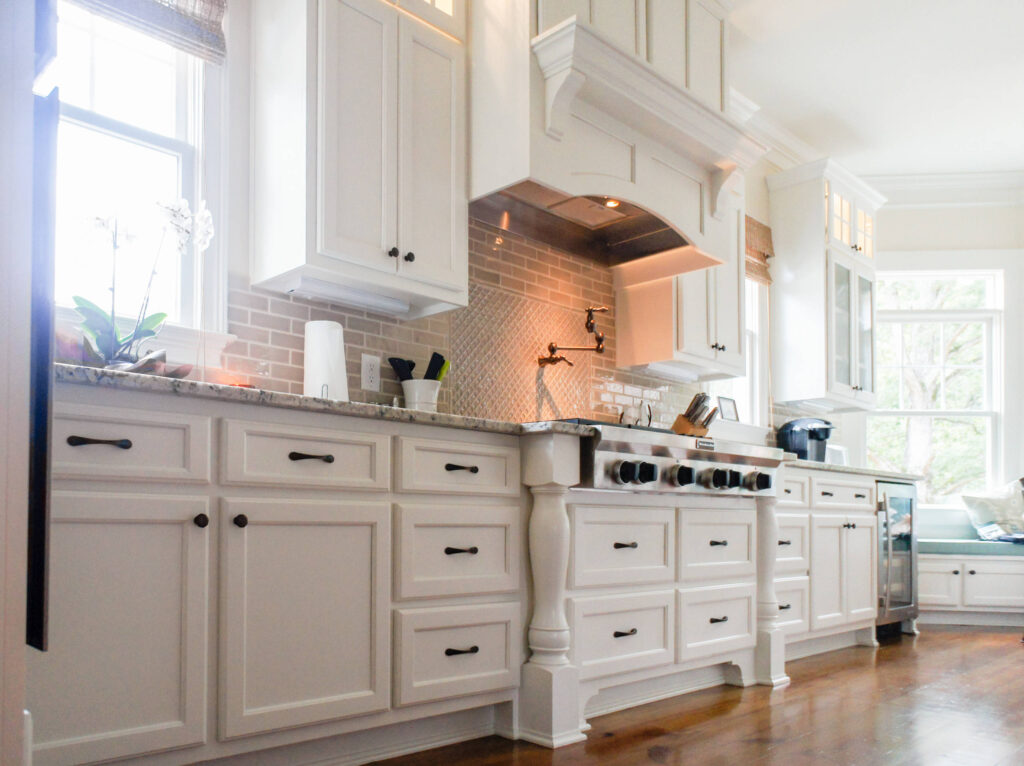
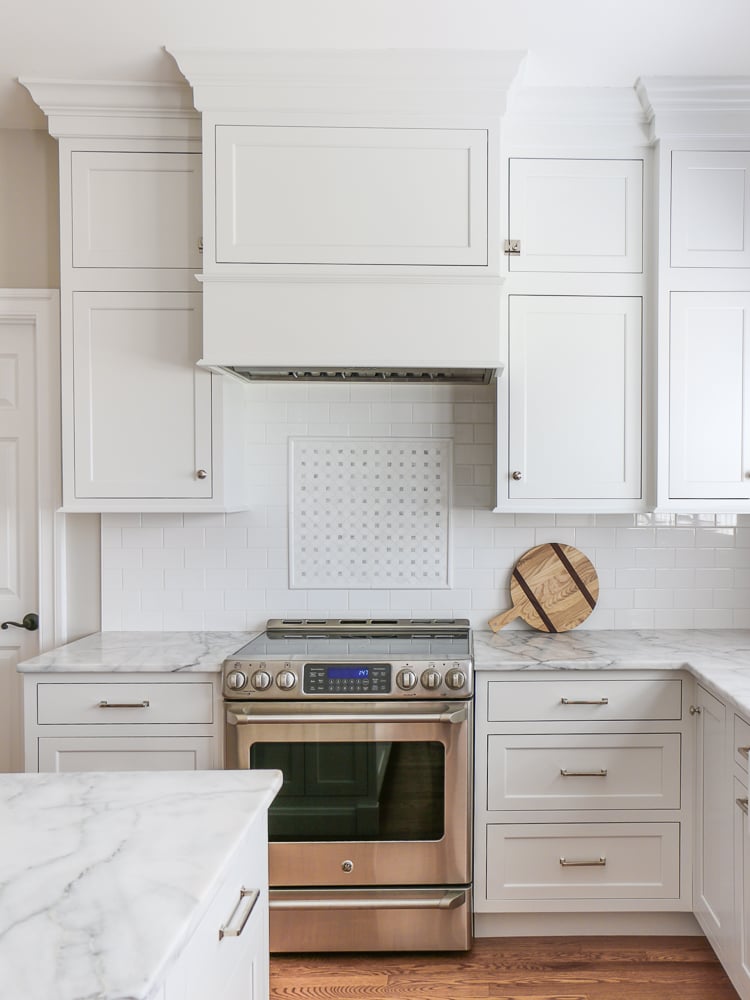
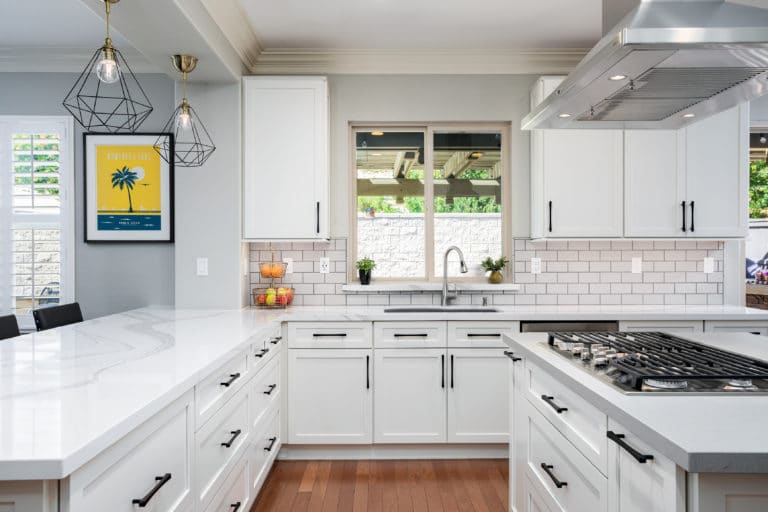
Understanding Shaker Cabinet Door Design
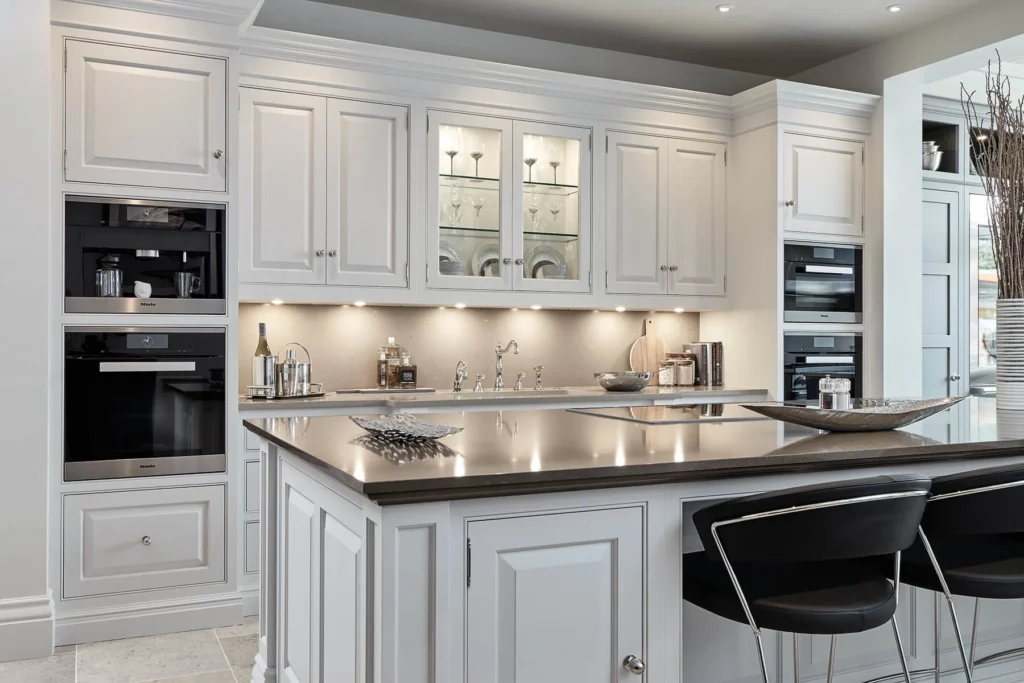

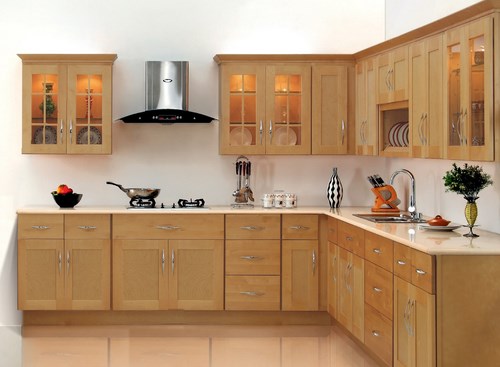
Shaker cabinet doors, also known as shaker doors, are known for their simple design and clean lines. These features make them an excellent choice for those looking to achieve a minimalistic, yet timeless look in their home. A shaker cabinet door consists of a frame made from rails and stiles joined at 90-degree angles and a flat center panel. The choice of material for the center panel depends on your desired finish. If you plan to paint your own cabinet doors, MDF is the recommended material. For a natural wood look, plywood in the same wood species as the frame is the way to go.
Creating grooves in the rails and stiles is an essential part of the shaker cabinet door construction, as these grooves accommodate the 1/4” thick center panel. In the following sections, we’ll guide you through the process of choosing the right wood, measuring, and building your own doors.
Choosing the Right Wood for Your Shaker Cabinet Doors
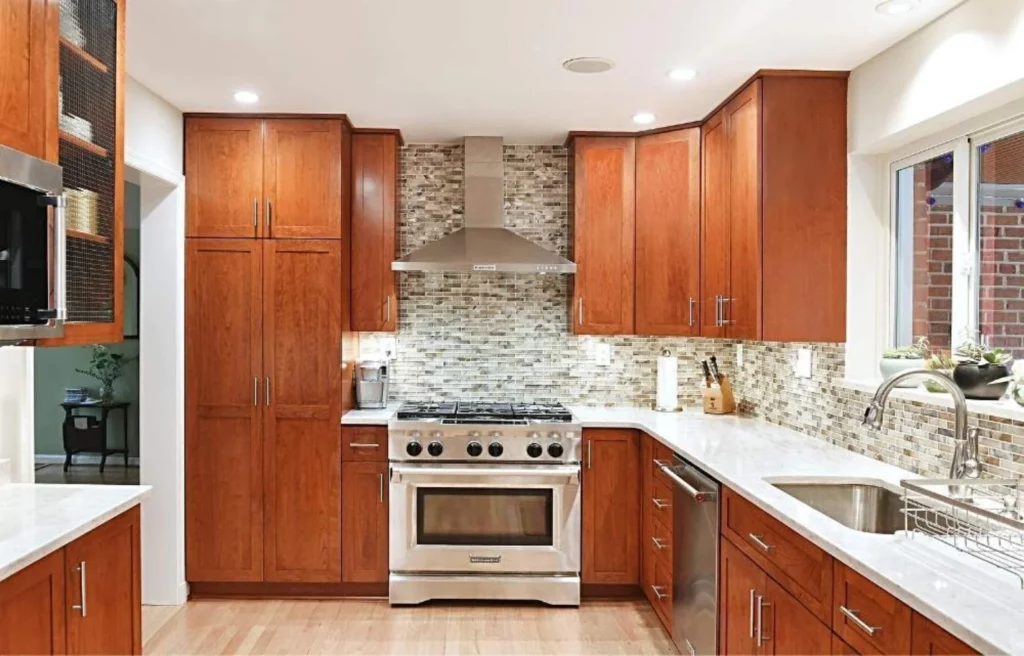
When selecting the wood for your shaker cabinet doors, it’s essential to consider factors such as: personal preference, budget, durability, appearance, and desired finish. Popular wood choices for shaker doors include:
- Oak
- Maple
- Cherry
- Pine
- Plywood
For painting your cabinet doors, spruce (or whiteboard) planks for the frames and luan for the panel are recommended. Remember, the hinges can be adjusted after installation if needed.
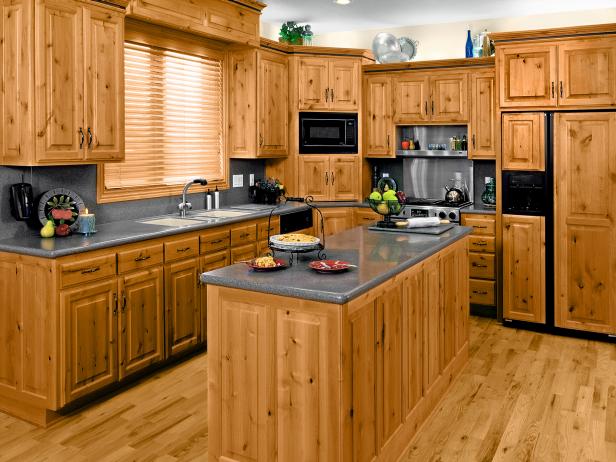
Keep in mind that the type of wood you choose will affect the overall look and feel of your cabinet doors. Some options to consider are:
- Oak: known for its prominent grain patterns
- Maple: offers a smoother, more subtle appearance
- Cherry: popular choice for its rich, warm color and natural beauty
- Pine: budget-friendly option, but choose knot-free boards for a more uniform appearance
Measuring and Calculating Door Dimensions
Before you start building your DIY shaker cabinet doors, it’s crucial to take accurate measurements and perform precise calculations. This will ensure that your doors fit perfectly within the cabinet opening and function as intended.
In the following subsections, we’ll guide you through the process of measuring cabinet openings, determining overlays and insets, and calculating the door size.
Measuring Cabinet Openings
To measure the cabinet openings for your shaker doors, follow these exciting steps:
- First, measure the opening from top to bottom and left to right.
- Write down the exact width and height of the opening, and don’t forget to take into account any overlay that you want to add.
- If you’re replacing existing doors, measure the existing door from outside edge to outside edge.
It’s essential to measure the cabinet opening in three locations: top, middle, and bottom. This ensures that you get the most accurate measurement, as cabinet openings may not be perfectly square. If the three measurements are not equal, go with the smallest measurement to ensure a proper fit.
Determining Overlays and Insets
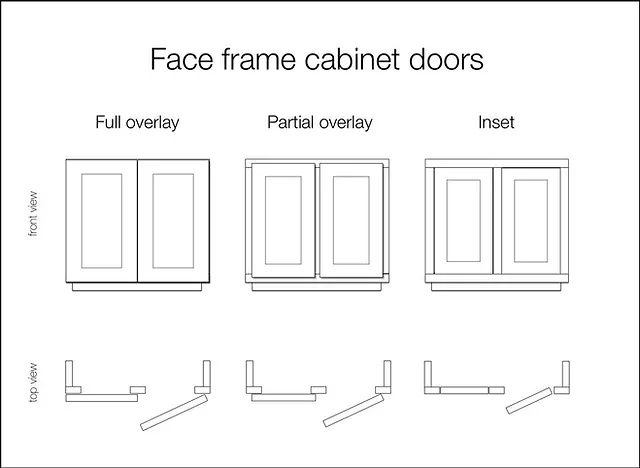
Overlays and insets refer to the way cabinet doors are positioned in relation to the cabinet frame. Overlays completely cover the cabinet box frame, while insets are set within the cabinet frame. These options allow for different design styles and can affect the overall cost and installation process of the cabinet doors. These doors are available in different overlay options. These options include full overlay, partial overlay and inset doors.
Inset doors, also referred to as inlay doors, are installed within cabinet door openings using pocket holes. They have a gap of roughly 1/8 inch to facilitate proper door operation. When measuring and calculating door dimensions, it’s crucial to take into account the type of overlay or inset you want for your cabinet doors. This will affect the overall size and appearance of the doors.
Calculating Door Size
To calculate the door size by adding the overlay to the cabinet door opening and doubling it, you need to add the overlay to the cabinet door opening and then double the result. This calculation will give you the correct dimensions for creating doors that will cover the cabinet opening completely with the desired overlay.
If you’re opting for inset doors, you need to subtract 1/8” from the cabinet door opening to account for the gap around the door. This will ensure that your inset doors fit perfectly within the cabinet opening and function smoothly.
Building Your DIY Shaker Cabinet Doors: Step-by-Step Process
Now that you have a solid understanding of shaker cabinet door design and have measured and calculated the door dimensions, it’s time to start building your DIY shaker cabinet doors!
In the following subsections, we’ll guide you through the step-by-step process of creating cabinet doors:
- Cutting rails and stiles
- Creating grooves and tenons
- Preparing the center panel
- Assembling the door
- Applying glue and clamping
- Adding the finishing touches
- Installing your beautiful new cabinet doors.
Cutting Rails and Stiles
To cut the rails and stiles for your shaker cabinet doors, you’ll need a miter saw or table saw. Begin by cutting the rails and stiles to the desired dimensions according to your measurements and calculations. Remember to keep in mind the groove that will need to be cut into the rails and stiles for the center panel.
When cutting the rails and stiles, it’s crucial to ensure a clean and accurate cut. This will ensure that the pieces fit together seamlessly when assembling the door frame. If you’re unsure about the accuracy of your cuts, make adjustments and test them again on another piece of scrap wood. Save those scrap boards! They will be useful for trial cuts later. Make sure to keep at least two pieces that are 8” long.
Creating Grooves and Tenons
Creating grooves and tenons is a crucial step in building your shaker cabinet doors, as they provide the structure for assembling the door frame and center panel. You can use a table saw or a router table to do the following: create grooves in the rails, stiles for the center panel, and cut tenons on the rail ends. The use of a dado blade or rail and stile router bits can make this process even faster and more precise.
When creating grooves and tenons, it’s essential to ensure that they fit together snugly and securely. To achieve this, follow these steps:
- Make multiple passes with your table saw or router.
- Test the fit of the tenon in the groove, ensuring that the tops are flush and there are no gaps.
- Run a thorough test on a scrap piece before committing to the final setting.
- Save the test pieces to make future setup easier.
Preparing the Center Panel
Once you’ve cut the rails and stiles and created the grooves and tenons, it’s time to prepare the center panel for your shaker cabinet doors. Measure the distance between the rails and stiles, adding 1/4 inch to account for the grooves. Cut the center panel from plywood or MDF to the measured dimensions using a circular saw or table saw.
Before assembling the door, do a test fit with the center panel to ensure that it fits snugly within the grooves of the rails and stiles. If the panel doesn’t fit properly, make adjustments as necessary to achieve the perfect fit.
Assembling the Door
With all the components prepared, you’re ready to assemble your shaker cabinet door! Here’s how:
- Slide the center panel into the grooves of the rails and stiles, ensuring that it sits snugly and securely within the frame.
- Apply wood glue to the joints where the rails and stiles connect.
- Position the rails and stiles together to form the door frame.
Once the door is assembled, follow these steps:
- Use clamps to hold the pieces together while the glue dries.
- Ensure that the door remains square during the drying process by periodically checking the alignment and making any necessary adjustments.
- Allow the glue to dry completely before moving on to the finishing touches and installation.
Applying Glue and Clamping
After assembling the door, follow these steps to apply wood glue to the joints:
- Apply the glue evenly and sparingly to ensure a strong bond.
- Pay special attention to the joints where the rails and stiles connect.
- Be careful not to apply too much glue, as excess glue can seep out of the joints.
- If glue does seep out, don’t let it dry. Wipe it away quickly with a damp rag.
Once the glue has been applied, follow these steps:
- Clamp the door together to hold the pieces securely in place while the glue dries.
- Use a square or other measuring tool to ensure that the door remains square during the drying process.
- Allow the glue to dry completely (usually 24 hours) before moving on to the finishing touches and installation.
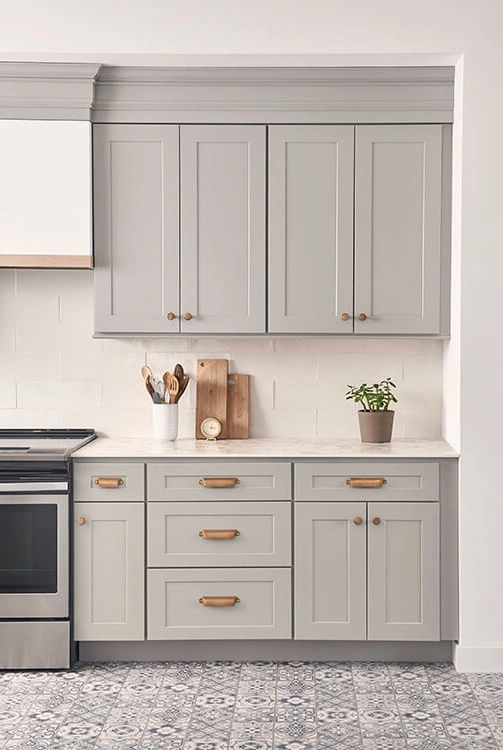
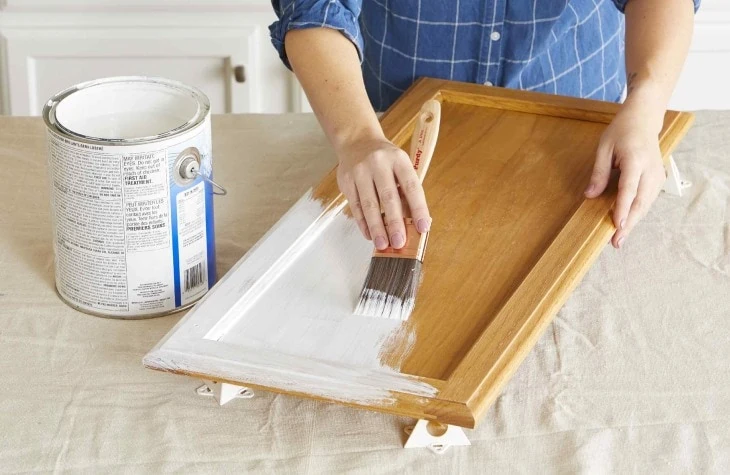
Finishing Touches and Installation
With your shaker cabinets assembled and the glue dried, it’s time to add the finishing touches. Begin by sanding the door with a fine-grit sandpaper to smooth any rough edges or uneven surfaces. Next, prime and paint or stain the door according to your preference. Be sure to follow specific tips for painting or staining shaker cabinet doors, such as using primer, wood conditioner, sandpaper, and tack cloth for a smooth, professional finish.
Once the door is painted or stained and has had ample time to dry, install hinges and hardware using pocket hole screws, a concealed hinge jig, or other appropriate tools. Ensure proper alignment and functionality by testing the door before attaching it to the cabinet frame.
Congratulations! You’ve successfully created and installed your DIY shaker cabinet door!
Tools and Materials Required
To build shaker doors, you’ll need to gather some essential tools and materials. These include:
- Wood for the rails and stiles
- Plywood or MDF for the center panel
- Wood glue
- Clamps
- A table saw or miter saw
- A router or dado blade
- Sandpaper
- Paint or stain
By following these steps, you can successfully make shaker cabinet doors and enhance the look of your home.
In addition to these basic materials, you may need additional tools and safety equipment, such as goggles, gloves, and a mask when working with power tools. Remember, investing in quality materials and tools can help guarantee the success of your project, so choose wisely!
Tips for Painting or Staining Your Shaker Cabinet Doors
When painting or staining your shaker cabinet doors, it’s essential to follow some specific tips to achieve a smooth, professional finish. Here are some steps to follow.
- Before applying paint or stain, make sure that the door is clean and free of dust by wiping it down with a tack cloth or microfiber cloth.
- When sanding, start with 80-grit sandpaper to smooth any rough surfaces.
- Move on to finer grits (such as 120 or 220) for a silky-smooth finish.
By following these steps, you can accomplish a beautiful finish on your doors.
If you’re staining your doors, using a wood conditioner before applying the stain can help prevent blotchiness and guarantee a more even color. Apply two coats of paint or stain, allowing enough drying time between each coat. This will result in a durable and beautiful finish. A paint sprayer is highly recommended for painting shaker style cabinet doors, as it provides a smooth and even application.
Installing Hardware and Hinges
After your shaker cabinet doors are painted or stained and have had enough time to dry, it’s time to install the hardware and hinges. A concealed hinge jig is an excellent tool for making the installation process easier and more precise. Choose hinges and hardware that are compatible with the size and weight of your cabinet doors. This will confirm proper alignment and functionality.
When installing handles or knobs on your doors, follow these steps:
- Use a template to establish that they are installed at the same place on each door.
- Pre-drill holes for the hardware to prevent splitting the wood.
- Attach the hardware securely.
Now, all that’s left is to attach the finished door to the cabinet frame and admire your hard work!
Cost Comparison: DIY vs. Purchasing Shaker Cabinet Doors
One of the primary motivations for taking on a DIY project is the potential savings compared to purchasing pre-made doors.
- DIY shaker cabinet doors cost about $10 per door, not including the cost of tools
- Purchasing pre-made doors can cost $93.39 each for unfinished doors
- Purchasing pre-made doors can cost $216.02 each for painted doors with hinge holes drilled
While there is undoubtedly a significant cost difference between DIY and purchasing shaker style cabinet doors, it’s essential to consider factors such as materials, tools, and time investment. Building your cabinet doors can be a rewarding and cost-effective project. But, it requires skill, patience, and the right tools. If you’re willing to invest the time and effort, you can create beautiful, custom cabinet doors at a fraction of the cost!
Troubleshooting Common Issues
When building your DIY shaker cabinet doors, you may encounter some common issues, such as inaccurate measurements, ill-fitting joints, and uneven finishes. To prevent these issues, use quality materials, measure accurately, use the right tools, and take your time. If you do run into problems, don’t be discouraged! Troubleshooting is a natural part of any DIY project and provides valuable learning opportunities.
To keep your shaker style cabinet doors looking their best and functioning smoothly, regular maintenance is essential. Clean and inspect your cabinet doors for signs of wear and tear, and repair any damage immediately. Regularly oil or wax your cabinet doors to keep them looking their best. This also helps to protect them from the moisture and temperature fluctuations that can cause warping or cracking.
Summary
In this blog post, we’ve guided you through the process of creating your own DIY shaker style cabinet doors from understanding the design and selecting the right materials to measuring, cutting, assembling, and finishing your beautiful new doors. We’ve also discussed the cost savings and potential challenges of this DIY project, as well as the importance of regular maintenance to keep your cabinet doors looking their best.
So, are you ready to embark on this exciting DIY journey? With some patience, the right tools, and a willingness to learn, you can create stunning shaker cabinet doors. Ones that will transform your kitchen or laundry room, and give you the satisfaction of a job well done. Good luck and happy building!
Frequently Asked Questions
How do you make a simple shaker cabinet door?
Start by making the cuts, then cut the grooves and tenons.
Next, cut the central panel and glue-up. Finish it off with your favorite finish!
How hard is it to make shaker cabinet doors?
Building Shaker-style cabinet doors is surprisingly easy! With the help of a detailed step-by-step tutorial and a table saw, you’ll be creating these classic and sophisticated doors in no time!
The tutorial will walk you through the process of cutting the wood, assembling the frame, and adding the panel. You’ll also learn how to use a computer.
What kind of wood do you use to make a shaker cabinet door?
When making a shaker cabinet door, you should use 1×3 Poplar for the stiles and rails and 1/4-thick sheet wood or veneer panel for the center. This ensures a strong, stylish result without any mitered corners!
How do you convert cabinet doors to shaker style?
Replace existing doors with plywood panels, secure them with 5/8 inch Brad’s and mark two more horizontal strips between the two vertical strips to achieve a classic Shaker style cabinet door! This technique will give your cabinet doors a timeless look that will last for years to come. It’s a simple and cost-effective way to update the look of your kitchen, laundry room, etc. You can find pre-cut plywood panels at your local home improvement store.
What materials are best for the center panel of shaker cabinet doors?
For a professional look and finish, MDF is a great choice for painted shaker cabinet doors. While using plywood in the same wood species as the frame, you’ll achieve you a beautiful and natural wood look.
Sans Soucie Art Glass: Decorative, Custom & Frosted Glass Doors, Windows, Showers & Stained Glass Since 1976
Family-owned and operated since 1976, Sans Soucie Art Glass leads the industry in decorative glass and custom glass design — from sandblast frosted glass and carved glass to hand-painted and stained glass art — transforming ordinary glass into Works of Art Captured in Glass recognized worldwide.
Innovative Frosted Glass Door Designer Tool
In 2010, we invented and launched our Frosted Glass Pantry Door Designer – a fun, easy-to-use tool that makes it simple for anyone to design and customize not only pantry doors, but a wide range of frosted glass doors for every room.
Explore our Frosted Glass Doors Collection
Our custom frosted glass doors include a beautiful variety for every style and space:
- Pantry Doors
- Frosted Glass Interior Door
- Interior Doors with Frosted Glass
- Frosted Glass French Doors
- Frosted Glass Front Door
- Front Doors with Frosted Glass
- Interior Glass Doors
- Glass Barn Doors
- Frosted Glass Barn Door
- Sliding Glass Barn Door
- All Glass Doors Interior
- All Glass Front Doors
- Bathroom Doors with Frosted Glass
- Laundry Room Doors
- Wine Room Doors
If you already have a door, and only need the glass insert, we also offer:
- Frosted Glass for Interior Doors
- Door Glass Inserts for Front Doors
- Glass Panels for Pantry Doors
- Frosted Glass Inserts for Bathroom Doors
- Laundry Room Door Glass Inserts
- Glass Panels for Interior Wine Cellar Doors
Elegant Frosted Glass Throughout Your Home
While our frosted glass doors are a top choice, we also create stunning glass products for every area of your home, including:
- Frosted Glass Shower Doors
- Glass Shower Partition
- Frosted Glass Shower Panel
- Frosted Glass Showers
- Frosted Glass Windows
- Bathroom Window Frosted Glass
- Decorative Window Glass, Window Frosting
- Custom Glass Dining Table
- Custom Glass Coffee Table
- Glass Shelves, Custom Glass Shelves
- Hand Carved & Painted Mirrors
- Frosted Glass Signs, Etched Glass Signs
- Cabinet Door Glass Inserts, Frosted Glass Inserts for Cabinet Doors
- Glass Wall Art, Wall Art on Glass
Looking for Inspiration? Explore Our Galleries
Discover visual idea boards, style concepts, décor applications, real project photos, and helpful information in our expanding gallery collection:
- Custom Glass
- Custom Glass Edges
- Custom Mirror
- Decorative Glass
- Decorative Glass Doors
- Decorative Glass Front Doors
- Decorative Glass Interior Doors
- Decorative Glass Window
- Stained Glass
- Stained Glass Doors
- Stained Glass Front Doors
- Stained Glass Windows
Free Shipping. Expert Packing, Peace of Mind
With FREE SHIPPING on most orders and worldwide delivery from our studio in Palm Desert, California, every order is packed in-house by our expert glaziers using custom materials and proven methods — ensuring safe arrival with a damage rate of less than 1%!
Explore our complete frosted glass doors collection and find the perfect frosted glass door for your space. Have questions? Contact us today!
Copyright © 2025, Sans Soucie Art Glass. All rights reserved.